
A Decoupage Guide: Upcycling Your Bedroom Furniture
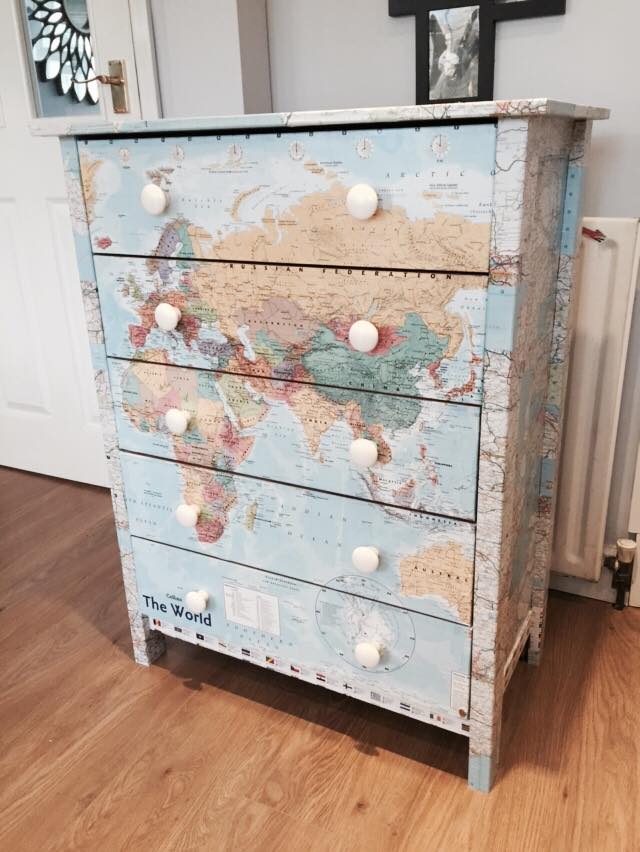
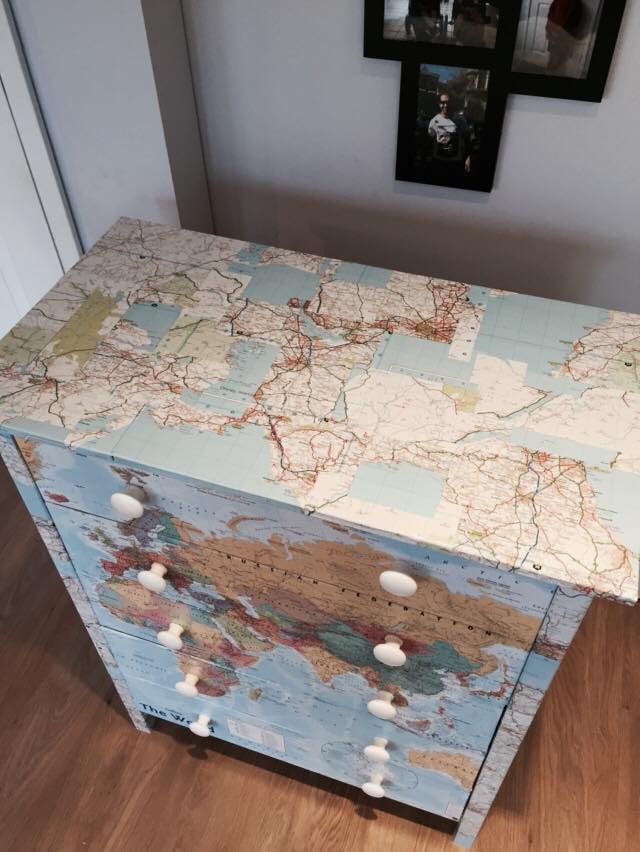
It seems that when it comes to bedroom furniture, choices of styles are limited. There is wooden, either au natural or painted in various neutral shades, or there is the plastic covered chipboard types akin to Ikea and other cheaper stores. Although both kinds can look nice when styled properly into a room, they lack individuality that shows your personality and interests. A simple yet effective way of customising your bedroom furniture is through decoupage. Depending on what youd prefer, you can choose images which compliment your bedroom, such as florals, or you can make your furniture the focal point of the room by using images which reflect your interests, such as a map used here to reflect the owners love of travelling.
If you want to upgrade your regular chest of drawers for something more unique and attractive, set yourself a weekend and follow these tips.
Tools:
Screwdriver
Sandpaper
Large paintbrush
Paint (use a colour close to the image you are decoupaging)
Modge podge glue (or three parts PVA glue to one part water)
Wallpaper, large paper poster or other images
Varnish
Sharp scissors
Damp sponge
Method:
Unscrew the handles and place to one side.
Pull out the drawers and lightly sand the front of each drawer. Sand the outer surface of the chest. Clean any residue left from sanding.
Paint all of the sanded surface. Depending on the colour and quality, you may need to paint two layers.
Lay the first flat on to the wallpaper or post and mark around the outside. Do the same for each drawer, making sure not to leave space between each image. Cut out each image.
Apply a layer of modge podge to the drawer face and carefully stick on the wallpaper, ensuring to smooth out any air pockets or wrinkles as you go. Wipe off any excess glue with a lightly damp sponge and leave to dry.
Measure and cut out the image for both sides, the back and the top of the chest. This can either be a single, large image per surface or can be multiple small images to be layered up.
Apply modge podge to each surface and stick on the image, ensuring there are no bubbles or wrinkles. Wipe off any excess glue and leave to dry.
Once all the glue is dry, apply a coat of varnish. Once dry, lightly sand to create an even surface and repeat two three times.
Paint the chest of drawer handles if necessary before attaching back to the drawers. Place the drawers back in to the chest for a completely updated chest of drawers.
Don't forget to check out our intro to decoupage, or for made to order customised furniture, check out Funky Furniture on Facebook who has kindly collaborated on our decoupage guide.